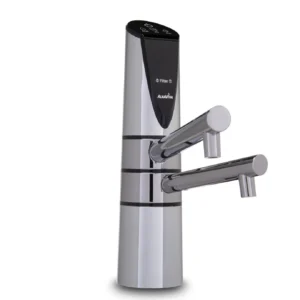
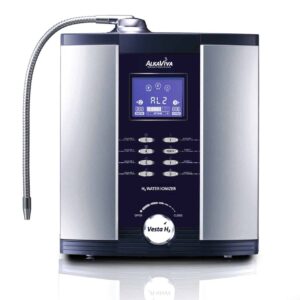
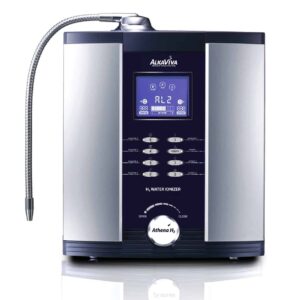
This article is the first in a series in which you will find several ways to clean your ionizer. The first method, the one in this article, is the cheapest for you, so I recommend it to you before the others. It is easy to do and below you have detailed instructions.
Why do I have to clean the ionizer?
Alkaviva ionizers have the best electrode self-cleaning systems. However, no matter how efficient the self-cleaning system is, small mineral deposits can appear in the electrolysis chamber over time. If these deposits exceed a certain threshold, the performance of your ionizer will decrease.
In order for your ionizer to maintain its pH, ORP and Hydrogen performance over time, it needs from time to time a single maintenance operation on your part: periodic cleaning.
Also in any ionizer there are other areas where mineral deposits can appear over time. These accumulations of minerals can reduce the flow of alkaline water or even completely clog the inner pipes of the ionizer, which can cause the appliance to block.
How often should I clean the ionizer?
Depending on the level of hardness of your water source, accumulation usually does not become a problem for at least 8-24 months of use.
In Romania, on average, a cleaning of the ionizer once every 12 months is sufficient.
If you live in an area with extremely hard water, you may need to clean the ionizer every 6 months.
How do I know when to clean the ionizer?
Ideally, clean your ionizer once a year, best when changing filters. If you prefer to clean it more often or less often, see below how you can tell that the ionizer needs cleaning.
Caution: if you choose to clean the ionizer less than once every 12 months, there is a risk of losing the warranty if the appliance fails due to mineral deposits.
The ionizer should be cleaned when mineral deposits become visible and exceed certain limits, or when the flow of alkaline water decreases.
Check the mineral deposits in your ionizer
1. Ionizers mounted above the kitchen worktop: Vesta H2, Athena H2, Melody II, Vesta GL 988, Athena JS 205, Orion JP 109, Melody / Isis JP104, Venus JP 107, Microlite, Neptune, or any other type of ionizer mounted on the countertop.
Remove the stainless steel hose and inspect both ends for signs of any white residue that may have accumulated inside the hose. This residue appears as a white crust on the inside of the hose. The appearance of this white ring is a clear sign of excessive mineral accumulation. If the white ring is thicker than 2 mm, the appliance needs cleaning.
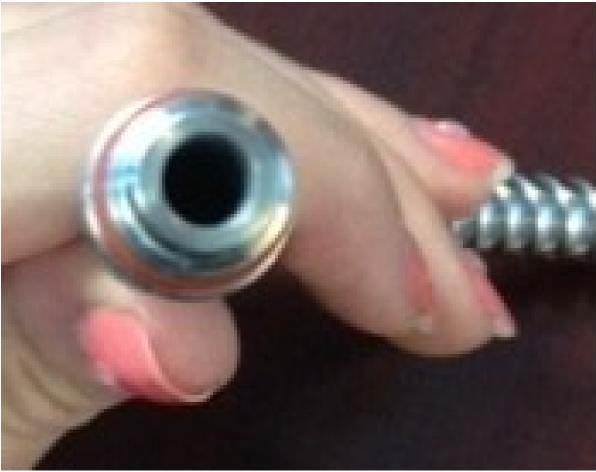
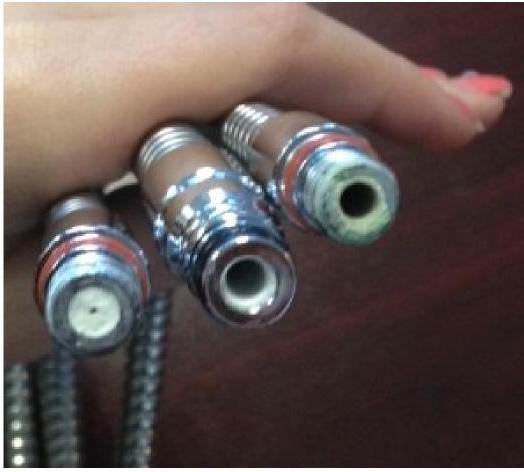
Most of the time, it is enough to check the flexible stainless hose to see if the ionizer needs to be cleaned. There are other areas that you can check, and that you can find in the article Does my ionizer have mineral deposits?
Note: If your ionizer is mounted under the countertop and you use a control valve (Undersink Kit), check for mineral deposits where the hose through which the alkaline water passes connects to the ionizer. Mineral deposits are not always visible at the tap.
2. Ionizers mounted under the countertop: Delphi or UltraDelphi
Inspect the end of the faucet through which the alkaline water flows. If you notice mineral deposits on the tip of the tap, it means that there are mineral deposits in the whole ionizer. Delphi has a 5/16 ”hose that runs from the ionizer to the computerized control valve. Disconnect the 5/16 ”hose and put it in vinegar overnight to soften and remove salt deposits.
For more details on how to check if the ionizer has mineral deposits, see also the article Does my ionizer have mineral deposits ?
Cleaning procedure
The safest way to clean the appliance is to circulate vinegar through the ionizer, using a small aquarium pump or a small garden pump.
The best time to clean the ionizer is when you are ready to replace the filter or filters of your ionizer. If you intend to clean the ionizer before the next change of filters, it is good to keep a set of spent filters for re-use at the next cleaning.
If you have any questions, problems or concerns while cleaning, call +40724 333 909 or +40757 661 693. We are here for you.
1. Prepare the necessary tools
To clean the ionizer you need:

- An aquarium pump, or other small submersible pump
What I call the aquarium pump below you will find at pet supply stores under the name of aquarium filter.
- I recommend an aquarium filter that:Has a power of at least 6W or be able to cope with an aquarium of at least 60 liters. You can find such filters at any neighborhood pet shop, at prices between 55 and 85 lei. On the aquarium filter box you will find at least one of the two parameters mentioned. In case of doubt, ask the seller at the pet shop.
- Has a round outlet nozzle, like the one in the picture
- 2 liters of 9-degree vinegar obtained by distillation
Buy 2 liters of vinegar, preferably white vinegar, obtained by distillation, with 9 degrees.
- A bowl
You will use the bowl to put the vinegar and the aquarium pump in it. It can be any vessel: saucepan, glass or plastic bowl, a PET container, etc.
- Optional: a set of old filters
You can clean the ionizer without old filters, but it’s easier that way.
2. Put the stainless steel flexible hose in the vinegar overnight (optional)
Remove the stainless steel flexible hose from the ionizer. On most models, the stainless hose is removed by unscrewing. At the Vesta GL988 ionizer, the stainless hose is removed by pulling on it, without rotating it.
Put it in a bowl with vinegar, preferably in an upright or oblique position. If you put it lying horizontally, the time required for cleaning will be much longer. A 2-2.5L PET with a cut top is a perfect container. You will need to give the flexible stainless hose a spiral shape to fit.
Washing and preparing the stainless hose will speed up the cleaning process, but if it does not have very large salt deposits in it, you can skip this step.
3. Prepare the ionizer for cleaning
3.1. Unplug the ionizer

3.2 If you do not have a set of old filters in the device, remove the filters from the device and cover with a sponge or silicone plug the hole where the top of the filters is connected to the device (for models in the JP and Vesta GL range), or the holes in the ionizer where the filters are connected (to Melody II, Athena H2 and Vesta H2).
If you have old filters in your device, skip this step.
The area where the plug is to be placed, at the JP range ionizers or at the Vesta GL. The plug is placed on both sides, at the ionizers with two filters.
4. Connect the gray acid water hose of the ionizer to the pump
The gray acid water hose of your ionizer must be connected to the outlet of the aquarium pump. Depending on the type of aquarium pump you bought, you will need to find the best way to connect the hose to the pump.
Most of the time, the acid water hose is a little thicker than the outlet of the aquarium pump, and it is enough to thin it a little with a cutter or knife, after which it will enter a little forced into the outlet nozzle of the pump.
Below you can see how I prepared the gray acid water hose for connection to an aquarium pump.


If your hose is thinner than the pump outlet nozzle, you can find a way to increase the diameter of the hose, either by putting a few layers of insulating tape on the hose or finding a small piece of a thicker hose, with which wear the end of the acid water hose.
Whatever your situation, when connecting the hose to the pump the connection must be tight/tight enough so that the pump pushes the vinegar through the hose and not next to it.

Aquarium pump with acid water hose connected
You can use the filter for the whole aquarium, or you can just take the pump out of it and use it only. Usually the pump is at the top of the filter and comes off the filter body very easily. In the image above I only used the pump, without the rest of the aquarium filter body.
5. Put the pump in the vinegar bowl and create the circuit
5.1. Bring the bowl of white vinegar to the ionizer
5.2. Place the aquarium pump with the ionic acid water hose connected to it in the vinegar bowl. The vinegar must completely cover the pump.
5.3. Install the flexible stainless hose to the ionizer. If you have already cleaned the flexible stainless hose, now install it in its place.
5.4. Position the end of the flexible stainless hose over the vinegar bowl. You should now have a circuit like the one below.
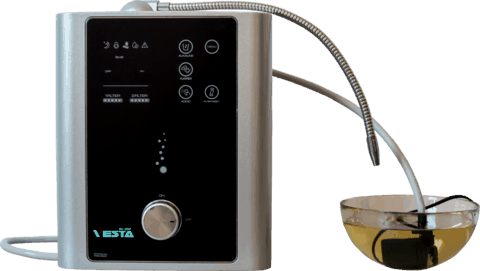
6. Start the pump and activate the cleaning process
Plug the aquarium pump plug. The pump will start and start pumping the vinegar into the ionizer through the gray hose of acidic water.
Soon, the vinegar should flow through the stainless hose back into the vessel where the pump is located. If this does not happen, sometimes you will need to put your mouth in the end of the stainless hose and draw air from it until the pump starts and the vinegar starts to flow into the vessel.
If the level of vinegar in the bowl drops a lot, top it up.
As the vinegar passes through the ionizer, it will dissolve the mineral deposits in the appliance. Smaller or larger pieces of white salts will begin to flow into the bowl, which shows that the cleaning process is working.
Allow the pump to run and the vinegar to flow through the appliance for about 2.5 hours.
If the flow of vinegar stops along the way, it is possible that certain pieces of salt detached from the appliance have blocked some narrower areas. Unplug the pump, blow through the stainless hose to unlock the circuit, and then plug the pump back in. The circuit will start again.
7. Stop the pump and reconnect the ionizer to the water source
7.1. After 2.5 hours of non-stop operation of the aquarium pump, prepare 2-3 liters of tap water.
7.2. With the pump running, move the end of the stainless steel hose over another bowl or over the sink. The pump will push the vinegar out of the ionizer without it returning to the vessel. When there is almost no vinegar in the vessel in which the pump is, add to the vessel the 2-3 liters of water you have prepared and let the pump push the water through the ionizer and clear it of vinegar.
7.3. When the pump has run out of water from the vessel, stop the pump and remove it from the vessel. Disconnect the acid water hose from the pump and put its end back in the sink.
7.4. If you removed the filters and put plugs in, remove the plugs and put the filters back in place. Be careful not to insert the filters without removing the plugs! You can clog the appliance.
7.5. Place the end of the stainless hose over the sink
7.6. If you have disconnected the ionizer from the water mains, reconnect it. Let the water flow through the ionizer for 10 minutes, without plugging it in.
7.7. Remove the old filters and install the new filters
7.8. Rinse the aquarium pump thoroughly under running water and then dry it before storing it until the next use. Rinsing and drying the pump before storage is important, because otherwise you risk that the pump will only work after a few cleanings and then break down.
7.9. Connect the ionizer to the outlet and start using it again. You have successfully completed the ionizer cleaning procedure. Congratulations!
Note only for Delphi or UltraDelphi ionizer owners:
For Delphi or UltraDelphi countertop ionizers, both the ionizer itself, the control valve, and the hoses that carry alkaline and acidic water from the ionizer body to the control valve must be cleaned:
The ionizer is cleaned by following the steps in this guide.
The control valve must be cleaned separately. One way to clean the faucet is to remove it from the countertop by unscrewing the retaining nut, and then filling the inner hoses of the faucet with white vinegar with a syringe. After filling the inner hoses with white vinegar, allow the vinegar to act for at least 3 hours.
Cleaning the hoses between the ionizer and the control valve by disconnecting them and inserting vinegar inside them. After making sure that the hoses are full of vinegar, let the vinegar work for at least 3 hours.
The cleaning process on the Delphi ionizer has a few steps in addition to cleaning the countertop ionizers. Until we produce a detailed guide for cleaning the Delphi / UltraDelphi model, use the information in this guide. If you have any questions, call us at +40724 333 909 or +40757 661 693.


